Raspberry Pi でSoftEther VPN 1.0 RC2を試す
6回目の今回は、Raspberry PiにSoftEther VPN 1.0 RC2 をインストールします。
- 1回目:Raspberry Pi でOSのインストールと初期設定を行う
- 2回目:Raspberry Pi で使用しないデーモンを停止する
- 3回目:Raspberry Pi でRAMディスクを使う
- 4回目:Raspberry Pi でカーネルにaufsを組み込む
- 5回目:Raspberry Pi で消費電流を測定する
- 6回目:Raspberry Pi でSoftEther VPN 1.0 RC2を試す
- 7回目:SoftEther VPN 1.0 RC2でtapデバイスを試す
- 8回目:Raspberry Pi でAsteriskを試す
- 9回目:Raspberry Pi でfsprotectを試す
2013年3月8日、待望のPacketiX VPN 4.0 のフリーウェア版である、SoftEther VPN 1.0 RC2 (Release Candidate 2) のダウンロード提供が開始されました。
※SoftEther VPN 1.0 は、「2013年の中頃にオープンソース化」されるとのことです。(予定)
SoftEther VPN の詳細は、こちら SoftEther VPN プロジェクト のWebサイト を参照ください。
早速、下図のようなネットワーク環境に、SoftEther VPNをインストールして、使い心地を試したいと思います。
SoftEther VPN をインストールしたRaspberry Pi は、LAN上に配置します。
消費電力は2W程度で電気代も気にならないレベルです。
SoftEther VPN の制限事項
PacketiX VPN 4.0 で使用できて、SoftEther VPN で使用できなくなった機能がいくつかあります。
SOHOで使用する場合はさほど問題にはならない機能ですが、syslog 転送が使えないのは残念です・・・
※VPNの設定は、PacketiX VPN 4.0 RC2 の設定ファイル(vpn_server.config)をそのまま引き継げました。
※VPNサーバ管理マネージャは、PacketiX/SoftEtherどちらのソフトウェアを使用しても、問題なくVPNサーバへの接続が可能でした。
- ログ保存設定は使えません。(グレーアウト)
- syslog の転送機能は使えません。(グレーアウト)
- DoS 防御機能は使えません。
- 外部サーバによるユーザー認証機能は使えません。(RADIUS / NT Domain)
- RSA証明書認証機能は使えません。
- 接続元IPアドレス制限機能は使えません。
SoftEther VPN 1.0 RC2 のインストール
Raspberry Pi にSoftEther VPN 1.0 RC2 をインストールします。
PacketiX VPN 4.0 RC2をMicroServerへインストールする場合と同一の手順で、インストールを行うことが可能です。違いは、OSがCentOSからDebianになっている関係で、自動起動設定ファイル(/etc/init.d/vpnserver)の対応が必要なことぐらいです。
ダウンロードファイルの展開先へ移動して、SoftEther VPN 1.0 RC2をダウンロードします。
※ダウンロードするファイルは、その時点の最新版を指定するようにします。(3月19日現在、build 9029が最新)
[root@ms03 ~]# cd /usr/local/src/
[root@ms03 src]# wget http://www.softether-download.com/files/softether/v1.00-9022-rc2-2013.03.07-tree/Linux/SoftEther%20VPN%20Server/32bit%20-%20ARM%20EABI/softether-vpnserver-v1.00-9022-rc2-2013.03.07-linux-arm_eabi-32bit.tar.gz
ダウンロードした圧縮ファイルを展開します。
[root@ms03 src]# tar zxvf softether-vpnserver-v1.00-9022-rc2-2013.03.07-linux-arm_eabi-32bit.tar.gz
展開先のディレクトリへ移動して、makeコマンドを実行します。ライセンス契約を読み、同意します。
[root@ms03 src]# cd vpnserver
[root@ms03 vpnserver]# make
--------------------------------------------------------------------

SoftEther VPN Server (Ver 1.00, Build 9022, ARM EABI) for Linux Install Utility
Copyright (c) SoftEther Project at University of Tsukuba, Japan. All Rights Reserved.

--------------------------------------------------------------------


Do you want to read the License Agreement for this software ?

 1. Yes
 2. No

(略)

VPN Tools を起動しました。HELP と入力すると、使用できるコマンド一覧が表示できます。

VPN Tools>Check
Check コマンド - SoftEther VPN の動作が可能かどうかチェックする
---------------------------------------------------
SoftEther VPN 動作環境チェックツール

Copyright (c) SoftEther Project.
All Rights Reserved.

この動作環境チェックツールを実行したシステムがテストに合格した場合は、SoftEther VPN ソフトウェアが動作する可能性が高いです。チェックにはしばらく時間がかかる場合があります。そのままお待ちください...

カーネル系 のチェック中...
              [合格] ○
メモリ操作系 のチェック中...
              [合格] ○
ANSI / Unicode 文字列処理系 のチェック中...
              [合格] ○
ファイルシステム のチェック中...
              [合格] ○
スレッド処理システム のチェック中...
              [合格] ○
ネットワークシステム のチェック中...
              [合格] ○

すべてのチェックに合格しました。このシステム上で SoftEther VPN Server / Bridge が正しく動作する可能性が高いと思われます。

コマンドは正常に終了しました。


--------------------------------------------------------------------
The preparation of SoftEther VPN Server is completed !


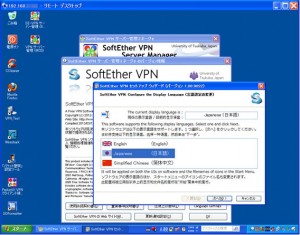
*** How to switch the display language of the SoftEther VPN Server Service ***
SoftEther VPN Server supports the following languages:
  - Japanese
  - English
  - Simplified Chinese

You can choose your prefered language of SoftEther VPN Server at any time.
To switch the current language, open and edit the lang.config file.


*** How to start the SoftEther VPN Server Service ***

Please execute ./vpnserver start to run the SoftEther VPN Server Background Service.
And please execute ./vpncmd to run the SoftEther VPN Command-Line Utility to configure SoftEther VPN Server.
Of course, you can use the VPN Server Manager GUI Application for Windows on the other Windows PC in order to configure the SoftEther VPN Server remotely.
--------------------------------------------------------------------

make[1]: ディレクトリ /usr/local/src/vpnserver から出ます
makeコマンドが正常に完了したら、vpnserverディレクトリを/usr/local 配下に移動させます。
[root@ms03 vpnserver]# cd ..
[root@ms03 src]# mv vpnserver /usr/local
インストールに使用したダウンロードファイルを削除しておきます。
[root@ms03 src]# rm -f softether-vpnserver-v1.00-9022-rc2-2013.03.07-linux-arm_eabi-32bit.tar.gz
vpnserverのインストール先へ移動して、パーミッションをroot権限でなければ読み書きできないように変更します。
[root@ms03 src]# cd /usr/local/vpnserver/
[root@ms03 vpnserver]# chmod 600 *
[root@ms03 vpnserver]# chmod 700 vpncmd
[root@ms03 vpnserver]# chmod 700 vpnserver
vpnserver の動作を開始する前に、VPN Server を正しく動作させることができるかどうかの最終確認を行います。
vpncmd コマンドライン管理ユーティリティを使用すると、Raspberry Pi 上で VPN Server を動作させられるかどうか(十分な機能を持っているかどうか)を、検査することができます。
[root@ms03 vpnserver]# ./vpncmd
vpncmd コマンド - SoftEther VPN コマンドライン管理ユーティリティ
SoftEther VPN コマンドライン管理ユーティリティ (vpncmd コマンド)
Version 1.00 Build 9022 Release Candidate 2 (Japanese)
Compiled 2013/03/07 22:18:11 by yagi at pc26
Copyright (c) SoftEther Project. All Rights Reserved.

vpncmd プログラムを使って以下のことができます。

1. VPN Server または VPN Bridge の管理
2. VPN Client の管理
3. VPN Tools コマンドの使用 (証明書作成や通信速度測定)

1 - 3 ?選択: 3

VPN Tools を起動しました。HELP と入力すると、使用できるコマンド一覧が表示できます。

VPN Tools>check
Check コマンド - PacketiX VPN の動作が可能かどうかチェックする
---------------------------------------------------
PacketiX VPN 動作環境チェックツール

Copyright (c) SoftEther Corporation.
All Rights Reserved.

この動作環境チェックツールを実行したシステムがテストに合格した場合は、SoftEther VPN ソフトウェアが動作する可能性が高いです。チェックにはしばらく時間がかかる場合があります。そのままお待ちください...

カーネル系 のチェック中...
              [合格] ○
メモリ操作系 のチェック中...
              [合格] ○
ANSI / Unicode 文字列処理系 のチェック中...
              [合格] ○
ファイルシステム のチェック中...
              [合格] ○
スレッド処理システム のチェック中...
              [合格] ○
ネットワークシステム のチェック中...
              [合格] ○

すべてのチェックに合格しました。このシステム上で SoftEther VPN Server / Bridge が正しく動作する可能性が高いと思われます。

コマンドは正常に終了しました。


VPN Tools>exit
スタートアップスクリプトへの登録
SoftEther VPN のインストールが完了したら、/usr/local/vpnserver/vpnserver プログラムを、Linux が起動している間は常にバックグラウンドで動作し続けるデーモンプロセスとして登録します。
/etc/init.d/vpnserver という名前で、スタートアップスクリプトファイルを新規に作成します。
※Debianでは、LOCKファイルの保存先ディレクトリは /var/lock/ を指定します。
[root@ms03 vpnserver]# pico /etc/init.d/vpnserver
#!/bin/sh
### BEGIN INIT INFO
# Provides:                     vpnserver
# Required-Start:               $local_fs $network
# Required-Stop:                $local_fs $network
# Default-Start:                2 3 4 5
# Default-Stop:                 0 1 6
# Short-Description:            SoftEther VPN 1.0 RC2
# Description:                  Start vpnserver daemon SoftEther VPN 1.0 Server
### END INIT INFO

DAEMON=/usr/local/vpnserver/vpnserver
LOCK=/var/lock/vpnserver

. /lib/lsb/init-functions

test -x $DAEMON || exit 0

case "$1" in
start)
sleep 3
log_daemon_msg "Starting SoftEther VPN 1.0 Server" "vpnserver"
$DAEMON start >/dev/null 2>&1
touch $LOCK
log_end_msg 0
sleep 3

;;

stop)
log_daemon_msg "Stopping SoftEther VPN 1.0 Server" "vpnserver"
$DAEMON stop >/dev/null 2>&1
rm $LOCK
log_end_msg 0
sleep 2

;;

restart)
$DAEMON stop
sleep 2

$DAEMON start
sleep 5

;;

status)
    if [ -e $LOCK ]
    then
        echo "vpnserver is running."
    else
        echo "vpnserver is not running."
    fi
;;
*)

echo "Usage: $0 {start|stop|restart|status}"
exit 1
esac
exit 0
作成したスタートアップスクリプトファイル(vpnserver)に実行権限を付与します。
[root@ms03 vpnserver]# chmod +x /etc/init.d/vpnserver
chkconfigコマンドを使用して、起動時にスタートアップスクリプトファイルが自動的にバックグラウンドで起動するように設定します。
[root@ms03 vpnserver]# chkconfig vpnserver on
[root@ms03 vpnserver]# chkconfig vpnserver --list
vpnserver      0:off  1:off  2:on   3:on   4:on   5:on   6:off
ここで、vpnserverを起動させます。
[root@ms03 vpnserver]# /etc/init.d/vpnserver start
[ ok ] Starting SoftEther VPN 1.0 Server: vpnserver.
VPN管理マネージャのインストール
softether-vpnserver_vpnbridge-v1.00-9022-rc2-2013.03.07-windows-x86_x64-intel.exe をWindows PC上でダウンロードしてインストールします。
こちら SoftEther VPNサーバの管理ツールのダウンロード からダウンロードします。
ダウンロードしたファイル(実行ファイル)を、ダブルクリックして、管理ツールのインストールを行います。
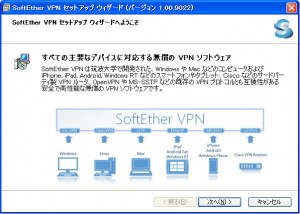
次へをクリックします。
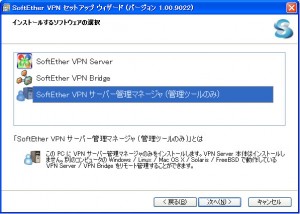
管理ツールのみを選択して、次へをクリックします。
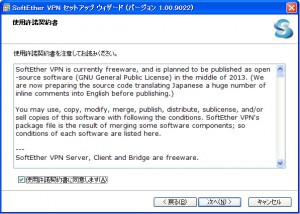
使用許諾契約書に同意して、次へをクリックします。
重要事項説明書を読み、次へをクリックします。
インストール先ディレクトリを選択て、次へをクリックします。
次へをクリックし、インストール処理を開始します。
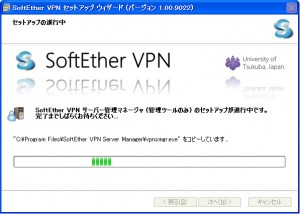
インストールが完了するまで待ちます。
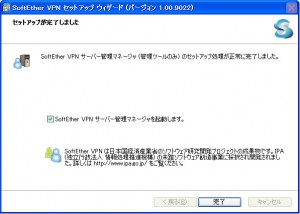
インストールが完了したら、完了をクリックします。
VPN Server の設定
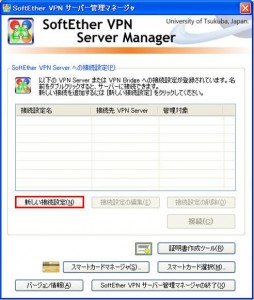
SoftEther VPN Server Manager のインストールが完了したら、VPNの接続設定を行います。
新しい接続設定をクリックします。
接続設定名を入力します。(設定名は任意の名前でOK)
ホスト名を(Raspberry PiのIPアドレス)入力します。
入力が完了したらOKをクリックします。
パスワードの欄は入力せずに、OKをクリックします。
パスワード を入力し、OKをクリックします。
OKをクリックします。
リモートアクセスVPNサーバーにチェックを入れて、次へをクリックします。
はいをクリックします。
OKをクリックします。
ダイナミックDNSホスト名を設定して上記のDNSホスト名に変更するをクリックします。
OKをクリックします。
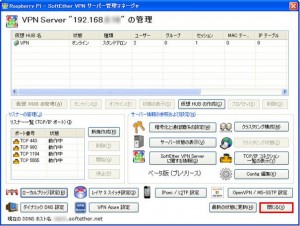
現在の状態を確認して閉じるをクリックします。
IPsec /L2TP / EtherIP /L2TPv3 サーバー機能の設定画面が自動的開くので、設定を行います。
L2TPサーバー機能を有効にする(L2TP over IPsec)にチェックを入れて、OKをクリックします。
IPsec事前共有鍵を設定します。(9文字以下を推奨)
設定が完了したらOKをクリックします。
VPN Azure を無効にする を選択してOKをクリックします。
ユーザを作成するをクリックします。
ユーザー名・本名・説明欄を入力します。
認証時のパスワードを入力します。
入力が完了したら、OKをクリックします。
Okをクリックします。
作成されたユーザーを確認します。
さらに、ユーザーを新規作成する場合は、新規作成をクリックします。
終了する場合は閉じるをクリックします。
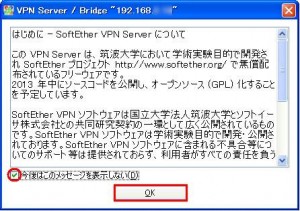
「サポートは提供されず、すべて利用者が自己責任を負う」旨の説明が書かれています。無償提供ですので当然です。
今後はこのメッセージを表示しないにチェックを入れて、OKをクリックします。
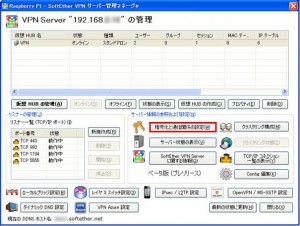
ローカルブリッジ設定をクリックします。
仮想HUBを選択します。
物理的な既存のLANカードとのブリッジ接続を選択します。
LANカードはeth0を選択します。
入力が完了したら、ローカルブリッジを追加をクリックします。
OKをクリックします。
OKをクリックします。
ローカルブリッジ設定を確認して、閉じるをクリックします。
暗号化と通信関係の設定 をクリックします。
syslog送信機能 が選択できなくなっています。
※SoftEtherで使用できなくなった機能です。
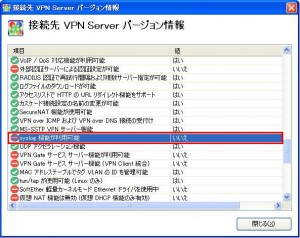
VPN Serverバージョン情報を確認します。
syslog機能が利用可能 いいえ が設定されています。
その他の管理 ログ保存設定が選択できなくなっています。
閉じるをクリックします。
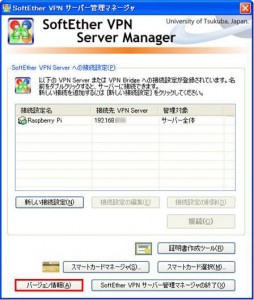
バージョン情報をクリックします。
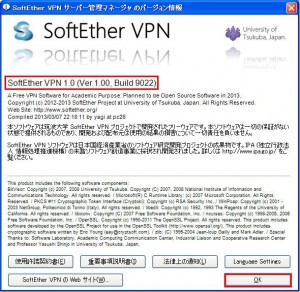
SoftEther VPN 1.0 のバージョンを確認します。
SoftEther VPN サーバー管理マネージャの終了をクリックします。
RTX1100のログに “ARP: Illegal packet…..” が記録される
SoftEther VPN を起動すると、YAMAHAのVPNルーター(RTX1100)のログに、イリーガルパケットが記録されるようになります。
無視しても問題ないのですが、精神衛生上好ましくありませんのでイリーガルパケットが記録されないように対応します。
Mar 8 20:14:28 192.168.0.1 ARP: Illegal packet at LAN1, IP=172.31.88.21, MAC=00:ae:57:14:fe:37
Mar 8 20:14:33 192.168.0.1 ARP: Illegal packet at LAN1, IP=172.31.88.21, MAC=00:ae:57:14:fe:37
イリーガルパケットが記録されないようにする方法は、オンラインマニュアル上に”ちゃんと”記述されています。

SoftEther VPN のコンフィグレーションファイルを修正します。
この変更を実施することで、RTX1100のログにイリーガルパケットが記録されなくなります。
1) Winidowsパソコン上へダウンロード
2) テキストエディタで該当箇所を ‘true’ に修正
3) 修正したファイルをインポートして書き込み
ルーターのポート開放(ポートフォワーディング)
ヤマハのルーター(RTX1100)の設定を変更し、Raspberry Pi 宛にパケットを転送するようにします。
※SoftEther VPN Clientのみを使用する場合は、ポート開放は必要ありません。(設置環境に依存します)
※L2TP/IPsecやOpenVPNを使用する場合は、ポート開放の作業が必要となります。
(iPhoneやAndroidを搭載した携帯端末からVPN接続を行う場合は、ポート開放が必要です)
※フィルタ設定を行っている場合は、そのルール変更を行う必要があります。
[RTX]# nat descriptor masquerade static 1 4 192.168.xx.xx udp 1194
[RTX]# nat descriptor masquerade static 1 5 192.168.xx.xx esp
[RTX]# nat descriptor masquerade static 1 6 192.168.xx.xx udp 500
[RTX]# nat descriptor masquerade static 1 7 192.168.xx.xx udp 4500
VPN接続動作の確認
VPN接続試験は、EVO3DのWiMAXまたは、3G回線を使用してインターネットへ接続し、テザリング機能を使いてノートPCからVPN接続を行います。
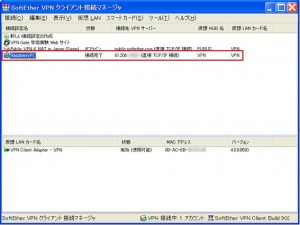
1.SoftEther VPN Client を使用してVPN接続
SoftEther VPN Server へ接続します。
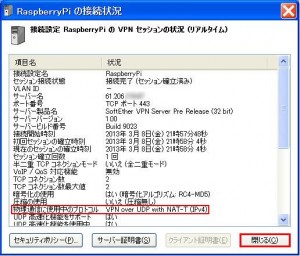
物理通信に使用中のプロトコルがVPn over UDP with NAT-T(IPv4)と表示されていることを確認します。
※NATトラバーサルで接続されているはずです。
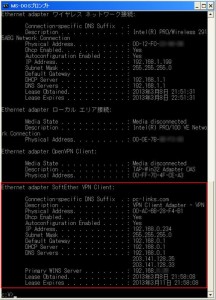
IPアドレス設定等を確認します。
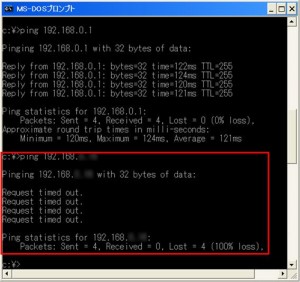
ルーターへのpingは通じますが、SoftEther VPN をインストールしたサーバへのpingは通じません。
※これは、Linuxの制限によるものですが、この状態では、サーバにインストールした他のプログラム(たとえばWebサーバやAsteriskサーバなど)には、クライアントPCからアクセスできない状態となっています。
VPN接続先のLAN上のPCが表示されることを確認します。
2.WindowsXP標準のVPN Clientを使用してVPN接続
WindowsXP標準搭載のクライアントからVPN接続を行います。
※WindowsXPで使用する場合はレジストリ修正が必要です。
詳細は、 WindowPCのレジストリ修正 を参照ください。
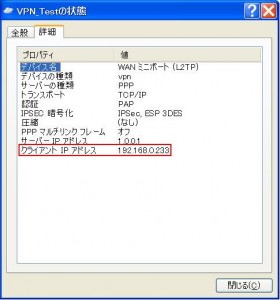
クライアントPCのIPアドレスを確認します。
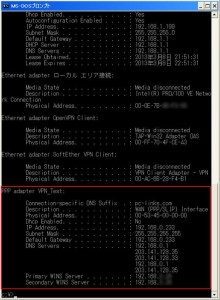
同じく、クライアントPCのIPアドレスを確認します。
リモートデスクトップ接続を行なえることを確認します。
3.OpenVPN Clientを使用してVPN接続
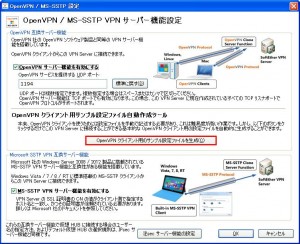
SoftEther VPNサーバ管理マネージャでOpenVPNクライアント用のサンプル設定ファイルを生成して、VPN接続クライアントPC上で設定ファイルを読み込ませます。
サーバー管理マネージャで、OpenVPNクライアント設定を保存します。
クライアントPCで保存した設定を読み込み、接続設定を完了させます。
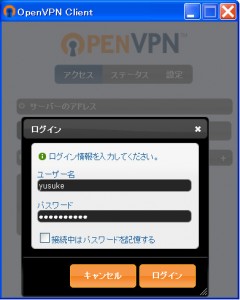
リモートアクセスなのでL3接続を選択して、VPN接続を行います。
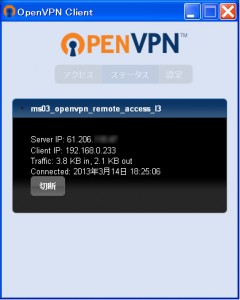
接続が完了すると、ステータスが表示されます。
※接続先のグローバルIPアドレスと、クライアントへ割り当てられたIPアドレスが表示されますので、確認します。
以上で、「Raspberry Pi でSoftEther VPN 1.0 RC2を試す」を終了します。


